Το σφάλμα "Το πρόγραμμα οδήγησης tablet δεν βρέθηκε" παρουσιάζεται όταν ο υπολογιστής σας δεν μπορεί να πάρει και να χρησιμοποιήσει το πρόγραμμα οδήγησης που είναι εγκατεστημένο για το tablet Wacom. Αυτό το σφάλμα μπορεί να προκύψει σε αρκετές περιπτώσεις, όπως όταν τα προγράμματα οδήγησης είναι παλιά, δεν έχουν ρυθμιστεί σωστά ή υπάρχουν κάποιες διενέξεις.
Αυτό το πρόβλημα είναι πολύ κοινό και δεν χρειάζεται να ανησυχείτε. Θα ξεκινήσουμε τερματίζοντας την υπηρεσία Wacom, θα ενημερώσουμε τα προγράμματα οδήγησης και μετά θα προχωρήσουμε σε άλλες τεχνικές. Ακολουθήστε τις παρακάτω λύσεις.
Λύση 1: Επανεκκίνηση της υπηρεσίας Wacom
Θα προσπαθήσουμε να επανεκκινήσουμε την υπηρεσία Wacom ως το πρώτο βήμα για την επίλυση του προβλήματος. Αυτό θα επανεκκινήσει ολόκληρη τη διαδικασία, θα ανανεώσει τις αποθηκευμένες διαμορφώσεις και θα προσπαθήσει να εντοπίσει ξανά το tablet σας. Μπορεί επίσης να επιδιορθώσει το ζήτημα "Wacom Pen Not Working" επειδή η υπηρεσία μπορεί μερικές φορές να προκαλέσει και αυτό το ζήτημα.
- Πατήστε Windows + R για να ξεκινήσετε την εφαρμογή Εκτέλεση. Πληκτρολογήστε " υπηρεσίες " . msc "στο πλαίσιο διαλόγου και πατήστε Enter.
- Περιηγηθείτε σε όλες τις υπηρεσίες έως ότου βρείτε αυτό που ονομάζεται " TabletServiceWacom ". Κάντε δεξί κλικ και επιλέξτε " Επανεκκίνηση ".

- Τώρα ελέγξτε αν το πρόβλημα έχει επιλυθεί.
Λύση 2: Ενημέρωση προγράμματος οδήγησης και επανεγκατάσταση προγραμμάτων
Εάν η επανεκκίνηση της υπηρεσίας δεν λειτουργεί, μπορούμε να προσπαθήσουμε να ενημερώσουμε το πρόγραμμα οδήγησης. Αρχικά, θα καταργήσουμε το πρόγραμμα οδήγησης και στη συνέχεια θα απεγκαταστήσουμε όλες τις σχετικές εφαρμογές. Η επανεγκατάσταση των εφαρμογών και των προγραμμάτων οδήγησης θα διασφαλίσει ότι αντιμετωπίζονται όλες οι εσφαλμένες διαμορφώσεις και ότι ο υπολογιστής θα αναγνωρίσει το tablet που είχε συνδεθεί για πρώτη φορά.
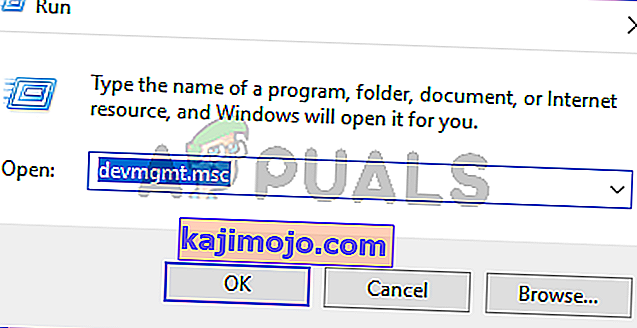
- Πατήστε Windows + R για να ξεκινήσετε την εφαρμογή Εκτέλεση. Πληκτρολογήστε " devmgmt. msc "στο πλαίσιο διαλόγου και πατήστε Enter. Αυτό θα ξεκινήσει τη διαχείριση συσκευών.
- Περιηγηθείτε σε όλες τις συσκευές έως ότου βρείτε την κατηγορία « Ανθρώπινες συσκευές διασύνδεσης ». Αναπτύξτε το και επιλέξτε το " Wacom Tablet ". Κάντε δεξί κλικ και επιλέξτε " Κατάργηση εγκατάστασης συσκευής ".

- Πατήστε Windows + R για να ξεκινήσετε την εφαρμογή Εκτέλεση. Πληκτρολογήστε " appwiz. cpl "στο πλαίσιο διαλόγου και πατήστε Enter. Θα εμφανιστεί ένα νέο παράθυρο που αποτελείται από όλα τα προγράμματα που είναι εγκατεστημένα στον υπολογιστή σας.
- Περιηγηθείτε σε όλα αυτά μέχρι να βρείτε οποιαδήποτε εφαρμογή που σχετίζεται με το Wacom. Κάντε δεξί κλικ και επιλέξτε " Κατάργηση εγκατάστασης ". Κάντε αυτό για όλες τις εφαρμογές που μπορείτε να βρείτε που σχετίζονται με το tablet.
- Πατήστε Windows + S για να ξεκινήσετε τη γραμμή αναζήτησης. Πληκτρολογήστε " cmd " στο πλαίσιο διαλόγου, κάντε δεξί κλικ στην εφαρμογή και επιλέξτε " Εκτέλεση ως διαχειριστής ".
- Μόλις εμφανιστεί η γραμμή εντολών, εκτελέστε τις ακόλουθες οδηγίες:
mklink / j "D: \ Program Files \ Tablet" "C: \ Program Files \ Tablet"
Σε αυτήν την περίπτωση, η προσαρμοσμένη θέση για τα αρχεία προγραμμάτων είναι μονάδα δίσκου. Μπορείτε να αντικαταστήσετε το "D" με ό, τι κι αν είναι η μονάδα δίσκου σας.

- Μεταβείτε στην επίσημη ιστοσελίδα της Walcom και κατεβάστε τα πιο πρόσφατα διαθέσιμα προγράμματα οδήγησης. Ταυτίστε τα σε μια προσβάσιμη τοποθεσία, καθώς θα έχουμε πρόσβαση σε αυτά αργότερα.
- Πατήστε Windows + R για να ξεκινήσετε την εφαρμογή Εκτέλεση. Πληκτρολογήστε " devmgmt. msc "στο πλαίσιο διαλόγου και πατήστε Enter. Αυτό θα ξεκινήσει τη διαχείριση συσκευών.
- Εντοπίστε το Walcom Tablet από τη λίστα συσκευών, κάντε δεξί κλικ και επιλέξτε " Ενημέρωση προγράμματος οδήγησης ".
- Εάν λάβετε το ζήτημα "Η τοποθεσία δεν βρέθηκε ", κατευθυνθείτε προς την τοποθεσία "Αρχεία προγράμματος> Πρόσθετα tablet" και, στη συνέχεια, κάντε διπλό κλικ στην επιλογή "fvWTPInstall_x86". Ακολουθήστε τις οδηγίες και, στη συνέχεια, προσπαθήστε να δημοσιεύσετε ξανά την παραπάνω εντολή. Ελέγξτε αν το πρόβλημα παραμένει.
Θα εμφανιστεί ένα νέο παράθυρο που θα σας ρωτά αν θέλετε να ενημερώσετε τα προγράμματα οδήγησης αυτόματα ή μη αυτόματα. Ορίστε τη δεύτερη επιλογή ( χειροκίνητα ). Περιηγηθείτε στην τοποθεσία όπου κατεβάσατε τα προγράμματα οδήγησης και εγκαταστήστε τα.

- Επανεκκινήστε τη συσκευή Wacom και συνδέστε την ξανά.
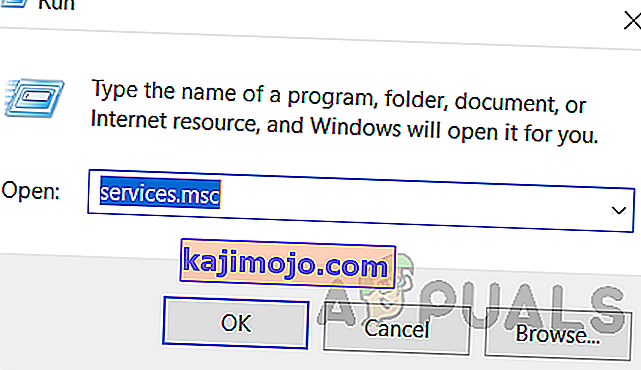
- Πατήστε Windows + R , πληκτρολογήστε " υπηρεσίες. msc "στο πλαίσιο διαλόγου και πατήστε Enter.
- Περιηγηθείτε σε όλες τις υπηρεσίες έως ότου βρείτε το " Wacom Professional Service ". Κάντε δεξί κλικ και επιλέξτε "Επανεκκίνηση". Τώρα ελέγξτε αν το πρόβλημα έχει επιλυθεί.

Λύση 3: Δημιουργία αρχείου δέσμης (εάν λειτουργεί η λύση 1)
Εάν το tablet Wacom λειτουργεί κάθε φορά που χρησιμοποιείτε τη μέθοδο 1, μπορείτε να δημιουργήσετε ένα αρχείο δέσμης στην επιφάνεια εργασίας σας. Αυτό θα σας διευκολύνει να κάνετε επανεκκίνηση της υπηρεσίας χωρίς να χρειάζεται να ανοίξετε τις υπηρεσίες και να την επανεκκινήσετε χειροκίνητα ξανά και ξανά.
- Κάντε δεξί κλικ στην επιφάνεια εργασίας σας και επιλέξτε " Νέο κείμενο κειμένου ".
- Πληκτρολογήστε τον ακόλουθο κώδικα στο έγγραφο κειμένου:
@echo off NET STOP WTabletServicePro χρονικό όριο / t 5 / nobreak> NUL NET START WTabletServicePro χρονικό όριο / t 2 / nobreak> NUL

- Save the file to your Desktop. Now rename it and set the name as “bat”. Make sure that you remove the .txt extension and replace it .bat
You can click this and it will automatically restart the service so the problem gets fixed. If simply clicking it prompts a UAC error, right-click it and select “Run as administrator”.
Note: If you are having difficulty updating the drivers, make sure that there isn’t a third party application monitoring your actions (Antivirus). You can temporarily disable it and then continue with the operation.
Solution 4: Try plugging in another port
If all the above methods don’t work, you should make sure that your tablet is connected properly to a working USB port. Try plugging the device into other ports present on your computer and check if it works there. If you have a spare USB hub lying around, plug it there too and check. If you are unsure about your USB ports, try plugging the tablet into another computer and check if it works there. If it does, troubleshoot through all the steps mentioned above again and figure out why your computer is giving the problem.
Solution 5: Deleting Some Files
In certain cases, deleting some files in important Windows’ Folders can help get rid of this issue. This is mostly because once certain drivers are installed their configuration data is saved in the System 32 folder and it might be corrupted due to which the user is facing this issue. Therefore, in this step, we will be deleting some important files from the Windows directory. For that:
- Navigate to the following location.
C:\Windows\System32

- In here, search for a file named “Wacom_tablet.dat”.
- Select this file and press “Shift” + “Delete” to remove it completely from your system.
- Confirm any prompts to proceed with the action and check to see if the issue persists.

Solution 6: Changing Power Settings
In some cases, the computer might be configured in such a way that it has the authorization to disable Wacom driver and services from functioning if it notices power fluctuations. This works normally in most cases, but it can malfunction sometimes and prevent you from being able to access your Wacom Tablet. In order to fix this:
- Press “Windows” + “R” to open the Run prompt.
- Type in “devmgmt.msc” and press “Enter”.
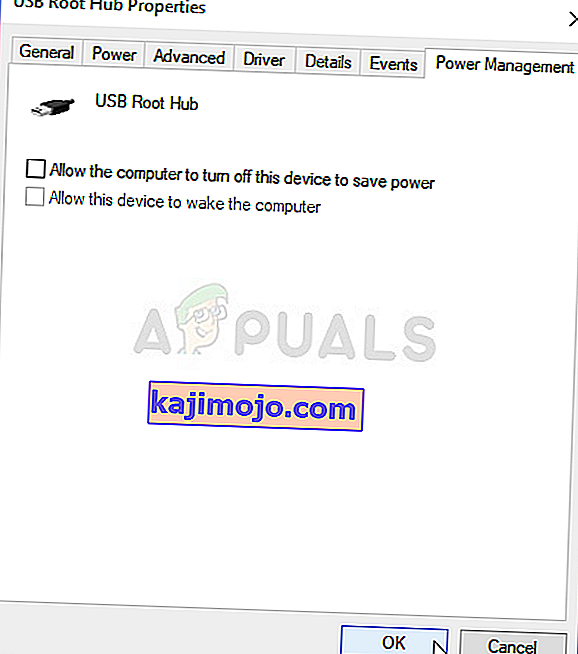
- In the device manager, right-click on the human interface option and select “Properties”.
- In the driver properties, click on “Power Management” and then uncheck the “Allow the computer to turn off this device to save Power” button.
- Save your changes and check to see if the issue persists.


Solution 7: Executing Some Commands
In rare cases, the issues can be fixed by making some changes to Windows’ configurations but this can sometimes backfire if the user doesn’t perform the steps correctly. But don’t worry since we have compiled the steps into some simple commands. For that:
- Press “Windows” + “R” to open the Run prompt.
- Type in “cmd” and press “Shift” + “Ctrl” + “Enter” to open it.
- Type in each of the following commands one by one and press “Enter” after each to execute it.
bcdedit.exe /set nointegritychecks on bcdedit.exe -set loadoptions DISABLE_INTEGRITY_CHECKS bcdedit.exe -set TESTSIGNING ON
- After executing the commands, check to see if the issue persists.
Solution 8: Uninstall Driver
It is possible that the driver might have gotten corrupted over time and it now needs to be uninstalled completely from the system. Therefore, in this step, we will first disconnect the device from our computer, uninstall the driver and then reinstall it completely after downloading it from the website. For that:
- Unplug the Wacom Tablet from the computer.
- Press “Windows” + “R” to open the run prompt.
- Type in “Taskmgr” and press “Enter” to open the task manager.

- In the task manager, under the processes tab, click on any process related to “Wacom” and select “End Task” to terminate it.
- After doing so, press “Windows’ + “R’ to open the Run prompt and type in “Devmgmt.msc” to run the device manager.
- In here, click on the Human Interfaces dropdown and right-click on the “Wacom Tablet” driver.
- Select “Uninstall Device” and follow the onscreen prompts to remove it completely from your computer.
- After that, navigate to the this site and download a relative driver for your tablet.
- Install the driver once it is downloaded and reconnect the tablet.
- Check to see if the issue persists.

Note: Make sure that the driver has been installed in the default directory and not a custom one because the application only recognizes the driver if it has been installed in the default location.
Method 9: Changing IMAGE Path
In some cases, the Image Path entry in the registry might be configured to load the drivers from the System 32 folder in Windows but since your driver has been installed in another custom path, you will have to teach the service to load the drivers from the custom path instead of the default one. In order to do that:
- Copy your Wacom drivers to the drive where your System 32 folder is located. If it located in the C drive, copy the files to that drive.
- Press “Windows” + “R” to open the Run prompt.
- Type in “Regedit” and press “Enter”.

- Navigate to the following location inside the registry editor.
Computer\HKEY_LOCAL_MACHINE\SYSTEM\CurrentControlSet\Services\WTabletServiceCon
- In the right pane, double click on the “Image Path” key and paste the location of the Wacom Drivers that you copied to the C drive in the first step.
For Example: Change it from F:\Program Files\Tablet\Pen\WTabletServiceCon.exeto C:\Program Files\Tablet\Pen\WTabletServiceCon.exe
- Press “Windows’ + “R” again and type in “Services.msc” and press “Enter”.
- In the services manager, right-click on the “Wacom Consumer Service” and select the “Restart” option

