Οι χρήστες συνήθως αντιμετωπίζουν αυτό το ζήτημα μετά από προσπάθεια ενημέρωσης των Windows 10 μέσω του Windows Update (WU). Το σφάλμα 0x8024a105σηματοδοτεί πρόβλημα με τα στοιχεία των Αυτόματων ενημερώσεων .Συνήθως, μετά από μια αποτυχημένη ενημέρωση, οι χρήστες θα δουν το ακόλουθο μήνυμα:
"Παρουσιάστηκαν προβλήματα κατά τη λήψη ορισμένων ενημερώσεων, αλλά θα προσπαθήσουμε ξανά αργότερα. Εάν εξακολουθείτε να το βλέπετε, δοκιμάστε να κάνετε αναζήτηση στον ιστό ή να επικοινωνήσετε με την υποστήριξη για βοήθεια. Αυτός ο κωδικός σφάλματος μπορεί να βοηθήσει: (0x8024a105). "

Εάν αυτήν τη στιγμή αντιμετωπίζετε αυτό το ζήτημα, καταφέραμε να εντοπίσουμε μερικές βιώσιμες διορθώσεις που βοήθησαν επιτυχώς τους χρήστες σε παρόμοια κατάσταση με εσάς. Ακολουθήστε καθεμία από τις παρακάτω μεθόδους, μέχρι να συναντήσετε μια λύση που θα καταφέρει να επιλύσει το πρόβλημά σας.
Μέθοδος 1: Εκτέλεση του προγράμματος αντιμετώπισης προβλημάτων του Windows Update
Ας ξεκινήσουμε απλά, εκτελώντας το εργαλείο αντιμετώπισης προβλημάτων του Windows Update . Ορισμένοι χρήστες κατάφεραν να επιτρέψουν την ολοκλήρωση των ενημερώσεων επιτρέποντας στο ενσωματωμένο εργαλείο αντιμετώπισης προβλημάτων να διορθώνει αυτόματα τα κατεστραμμένα στοιχεία. Ακολουθεί ένας γρήγορος οδηγός για τον τρόπο εκτέλεσης του Windows Update Troubleshooter :
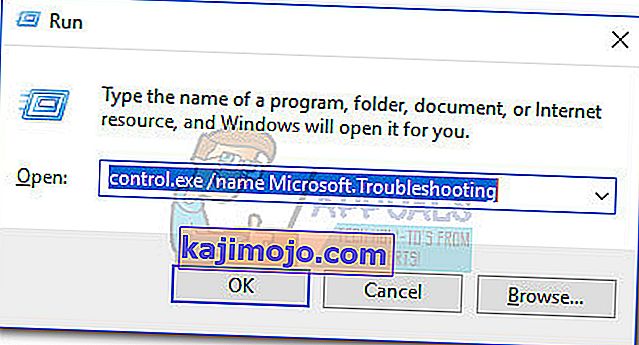
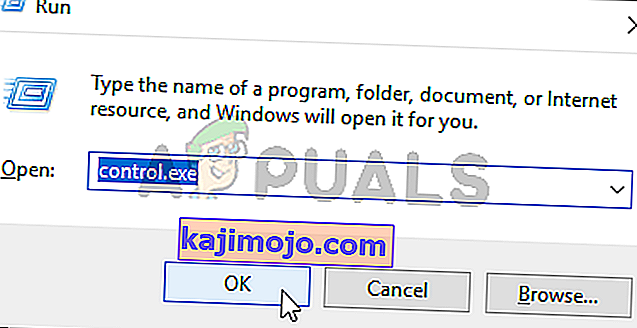
- Πατήστε το πλήκτρο Windows + R για να ανοίξετε ένα παράθυρο Εκτέλεσης. Πληκτρολογήστε ή επικολλήστε τα ακόλουθα.
control.exe / όνομα Microsoft. Αντιμετώπιση προβλημάτων
Πατήστε Enter για να ανοίξετε το ενσωματωμένο εργαλείο αντιμετώπισης προβλημάτων.
- Στο παράθυρο Αντιμετώπιση προβλημάτων , κάντε κλικ στο Windows Update και , στη συνέχεια, κάντε κλικ στο Εκτέλεση του προγράμματος αντιμετώπισης προβλημάτων .
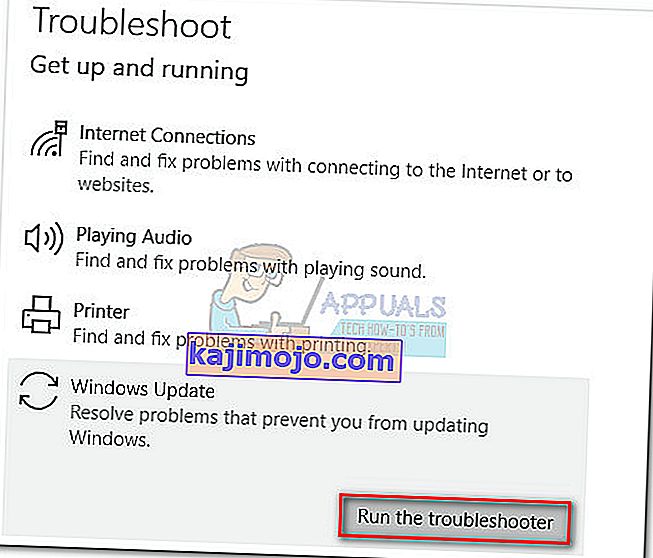
- Περιμένετε έως ότου το εργαλείο αντιμετώπισης προβλημάτων εντοπίσει προβλήματα με τον πελάτη ενημέρωσης. Εάν καταφέρει να εντοπίσει τυχόν προβλήματα με αυτό, ακολουθήστε τις οδηγίες στην οθόνη για να ενεργοποιήσετε την αυτόματη επισκευή. Συνήθως, θα πρέπει απλώς να επιλέξετε να εφαρμόσετε αυτήν την ενημέρωση κώδικα .
- Εάν το εργαλείο αντιμετώπισης προβλημάτων ενημέρωσης αναφέρει ότι κατάφερε να επιδιορθώσει οτιδήποτε, επανεκκινήστε τον υπολογιστή σας και δείτε εάν το πρόβλημα επιλύθηκε στην επόμενη εκκίνηση.


Εάν οι ενημερώσεις εξακολουθούν να αποτυγχάνουν με το σφάλμα 0x8024a105 , μεταβείτε στη Μέθοδο 2.
Μέθοδος 2: Αλλαγή ρυθμίσεων ελέγχου λογαριασμού χρήστη (UAC)
Εάν το εργαλείο αντιμετώπισης προβλημάτων δεν κατάφερε να επιλύσει αυτόματα το πρόβλημα, ας δούμε αν το πρόβλημα δεν δημιουργήθηκε από μια ρύθμιση ελέγχου λογαριασμού χρήστη . Όπως αποδεικνύεται, ορισμένες ενημερώσεις απέτυχαν με το σφάλμα 0x8024a105 επειδή ο συνδεδεμένος λογαριασμός δεν έχει τα απαραίτητα δικαιώματα. Μπορείτε να επιλύσετε αυτό το πρόβλημα εύκολα αλλάζοντας τα δικαιώματα λογαριασμών χρήστη που σχετίζονται με τον λογαριασμό σας σε διαχειριστή. Ακολουθεί ένας γρήγορος οδηγός για να το κάνετε αυτό:
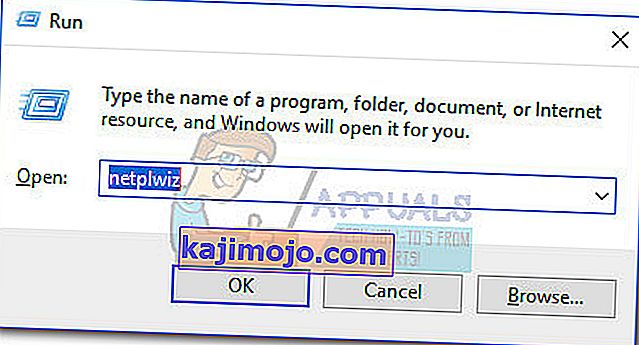
- Πατήστε το πλήκτρο Windows + R για να ανοίξετε ένα παράθυρο Εκτέλεσης. Πληκτρολογήστε ή επικολλήστε το " netplwiz " και πατήστε Enter για να ανοίξετε το ενσωματωμένο εργαλείο αντιμετώπισης προβλημάτων.
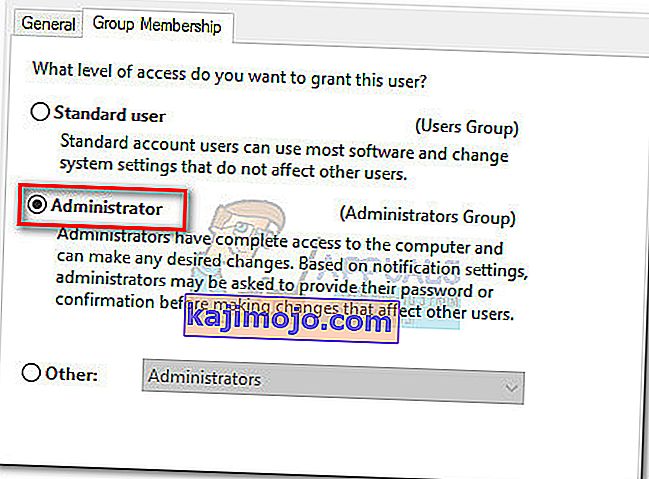
- Στην καρτέλα Χρήστες , επιλέξτε τον χρήστη που χρησιμοποιείτε και κάντε κλικ στο Ιδιότητες.
- Στο παράθυρο Ιδιότητες , μεταβείτε στην Ομάδα Μέλη και ορίστε το επίπεδο πρόσβασης στον Διαχειριστή . Πατήστε Εφαρμογή για να αποθηκεύσετε τις αλλαγές σας.
 Σημείωση: Εάν το επίπεδο πρόσβασης έχει ήδη οριστεί σε Διαχειριστής , μεταβείτε απευθείας στη Μέθοδο 3 .
 - Επανεκκινήστε τον υπολογιστή σας και βεβαιωθείτε ότι έχετε συνδεθεί με τον ίδιο λογαριασμό χρήστη. Μόλις ολοκληρωθεί η εκκίνηση, προσπαθήστε να εκτελέσετε ξανά τις ενημερώσεις. Εάν δείτε ότι αποτυγχάνουν με το σφάλμα 0x8024a105 , μεταβείτε στην τρίτη μέθοδο

 Σημείωση: Εάν το επίπεδο πρόσβασης έχει ήδη οριστεί σε Διαχειριστής , μεταβείτε απευθείας στη Μέθοδο 3 .
Μέθοδος 3: Μη αυτόματη επαναφορά των στοιχείων των Windows Updates
Εάν οι παραπάνω μέθοδοι αποδείχθηκαν ανεπιτυχείς, έχουμε λίγες επιλογές εκτός από την μη αυτόματη επαναφορά των στοιχείων ενημερώσεων των Windows και στη συνέχεια επανεκκίνηση της διαδικασίας του Windows Update . Από τις τέσσερις επιλεγμένες μεθόδους, αυτή έχει μεγαλύτερη πιθανότητα επιτυχίας, αλλά απαιτεί περισσότερη προσαρμογή.
Ακολουθεί ένας γρήγορος οδηγός για την επαναφορά των στοιχείων των Windows Updates:
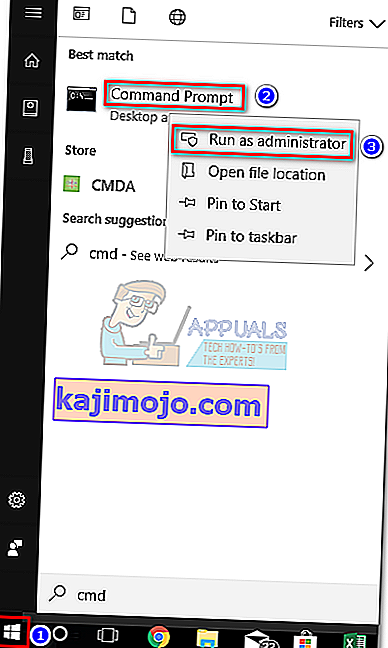
- Κάντε κλικ στη γραμμή εκκίνησης των Windows (κάτω αριστερή γωνία) και αναζητήστε το " cmd ". Στη συνέχεια, κάντε δεξί κλικ στη γραμμή εντολών και επιλέξτε Εκτέλεση ως διαχειριστής .
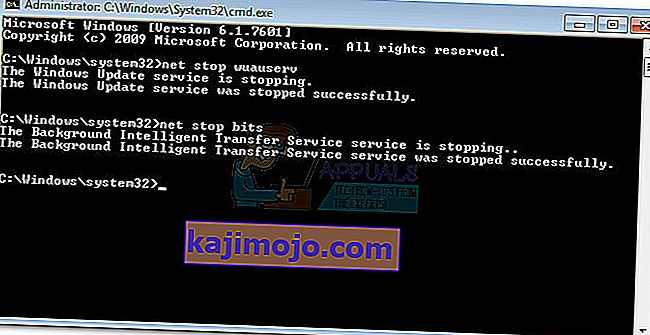
- Στην αυξημένη γραμμή εντολών, θα σταματήσουμε τις υπηρεσίες του MSI Installer, του Windows Update, BITS και του Cryptographic . Για να το κάνετε αυτό, εισαγάγετε τις ακόλουθες εντολές και πατήστε Enter μετά από κάθε μία:
net stop wuauserv net stop cryptSvc net stop bits net stop msiserver
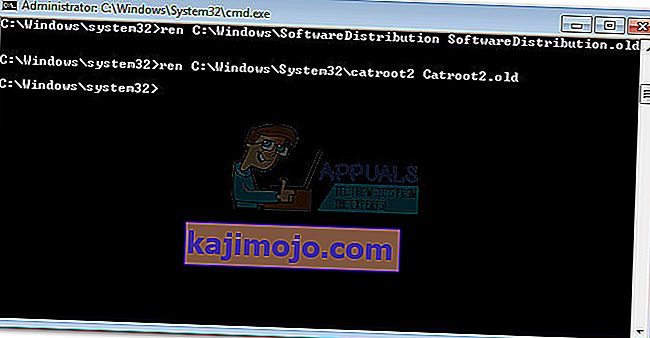
- Μόλις σταματήσουν όλες οι υπηρεσίες, ας μετονομάσουμε το φάκελο SoftwareDistribution και το φάκελο Catroot2 προκειμένου να αναγκάσουμε το Windows Update να ξαναρχίσει τα στοιχεία του. Επικολλήστε ή πληκτρολογήστε τις δύο εντολές στην ανυψωμένη γραμμή εντολών και πατήστε Enter μετά από κάθε μία:
ren C: \ Windows \ SoftwareDistribution SoftwareDistribution.old
ren C: \ Windows \ System32 \ catroot2 Catroot2.old
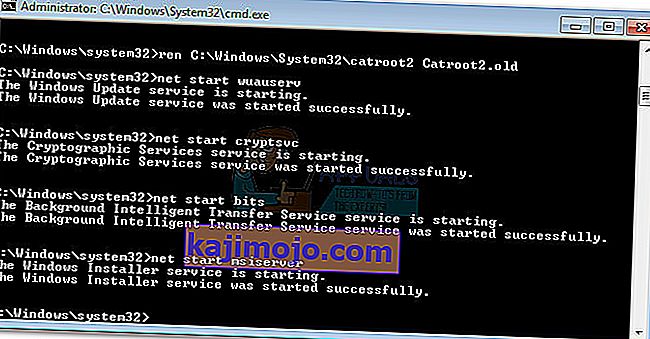
- Μόλις μετονομαστούν οι δύο φάκελοι, ήρθε η ώρα να επανεκκινήσετε τις υπηρεσίες του MSI Installer, BITS, Cryptographic και Windows Update. Για να το κάνετε αυτό, πληκτρολογήστε την ακόλουθη εντολή στη γραμμή εντολών και πατήστε Enter μετά από κάθε εντολή:
net start wuauserv net start cryptSvc net start bits net start msiserver
- Μετά την επανεκκίνηση των υπηρεσιών, κλείστε την αυξημένη γραμμή εντολών και επανεκκινήστε τον υπολογιστή σας.


Μέθοδος 4: Διαγραφή φακέλου διανομής λογισμικού
Σε ορισμένες περιπτώσεις, το πρόβλημα μπορεί να επιλυθεί απλώς διαγράφοντας ένα φάκελο χρησιμοποιώντας το Powershell. Επομένως, σε αυτό το βήμα, πρώτα, θα εκτελέσουμε το PowerShell ως διαχειριστή και στη συνέχεια θα διαγράψουμε το φάκελο διανομής λογισμικού για να ξεκινήσει η διαδικασία ενημέρωσης. Γι'αυτό:
- Press “Windows” + “X” buttons simultaneously and select the “Power Shell(Admin)” option.
- Type in the following command and press “Enter” to execute it.
net stop wuauserv
- Again, type in the following command and press “Enter”.
net stop bits
- Lastly, navigate to the following folder.
C:\Windows\SoftwareDistribution
- Press “Ctrl” + “A” to select all the contents of the folder and press “Shift” + “Del” button to delete them permanently.

- Confirm any prompts that warn you about deleting these files and then reboot your computer to complete the process.
- Now, try to update and check to see if the issue persists.

Once your computer boots back up, see whether you are able to install the updates without the 0x8024a105 error. If you do, try to perform an SFC scan to fix any issues with missing files or drivers.
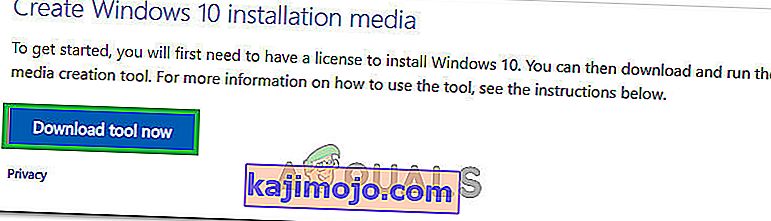
Method 5: Update Using Media Creation Tool
In some cases, you might be unable to update your computer using the default Windows Update process because your Windows might not be able to establish a proper connection with the Update servers. Therefore, in this step, we will be deploying the Windows Media Creation Tool to perform the update for us. It will automatically download and install the update files to upgrade our Windows. For that:
- Download the Windows Media Creation Tool from here.
- Run the executable and follow with the on-screen instructions for the initial setup.
- After the initial setup, select the “Upgrade this PC” option and click on “Next”.
- Accept the License terms and let the installer run.
- The tool will now automatically grab the update files from the servers and update your computer to the latest version available.
- Check to see if doing so has fixed the error.

Method 6: Delete Download Folders
When a new update is downloaded, it is generally stored in some folders on the computer. In this step, we will be deleting some of these folders and which will prompt the operating system to go ahead and download new files which can sometimes clear out the error and the update will be applied normally. For that:
- Press “Windows” + “R” to open the Run prompt.
- Type in “Control Panel” and press “Enter” to launch the classical control panel interface.
- In the Control Panel, click on the “View By:” option and select “Large Icons” from the list.
- Click on the “File Explorer Options” and a new window should pop up.
- In the File Explorer Options, click on the “View” button and then double click on the “Files and Folders” button to expand it.
- After that, double click on the ‘Hidden Files and Folders” to expand it as well.
- Check the “Show hidden Files, Folders and Drives” option and click on “Apply” to save your changes.
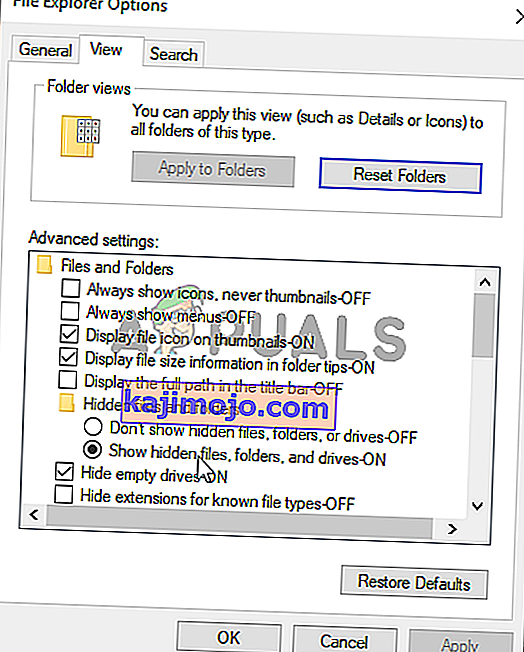
- Click on “OK” to close out of the window and press “Windows’ + “E” to launch the file explorer.
- In the File Explorer, delete the “$Windows.~WS” and “$Windows. ~BT” folders.
- Make sure to clear out the recycle bin as well so that they cannot be recovered.
- After this, press “Windows’ + “I” to launch settings and click on the “Update and Security” option.

- In Update and Security, click on the “Windows Update” option on the left pane and then click on the “Check for Updates” button.
- Updates will now automatically be downloaded and installed.
- Check to see if the issue persists.


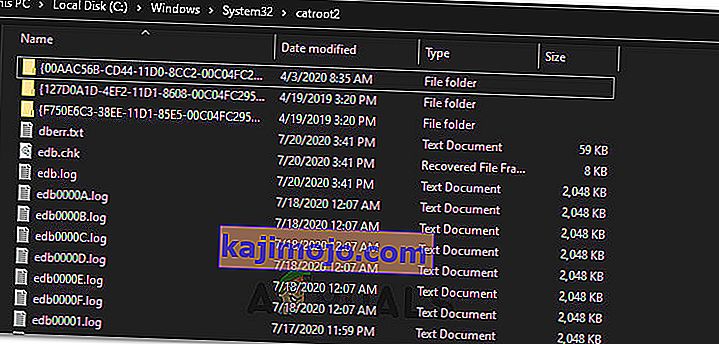
Method 7: Resetting Catroot2 Folder
In some cases, it is possible that the Catroot2 folder and its files have either been corrupted or they have been misconfigured due to which this issue is being triggered. Therefore, in this step, we will first be making some changes from the command prompt and then we will delete the files inside that folder. For that:
- Press “Windows’ + “R” to launch the run prompt.
- Type in “cmd” and then press “Shift” + “Ctrl” + “Enter” to provide administrative privileges.
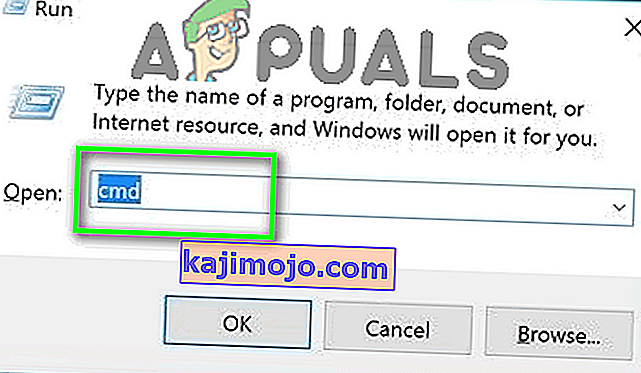
- Type in the following command and press “Enter” to execute it.
net stop cryptsvc
- After you have stopped the cryptsvc using the command above, type in the following commands into the command prompt one by one and press “Enter” after each to execute them on your computer.
md %systemroot%system32catroot2.old xcopy %systemroot%system32catroot2 %systemroot%system32catroot2.old /s
- After executing the commands stated above, we will be deleting all the files from the catroot folder without deleting the folder itself.
- Press “Windows’ + “R” to open the Run prompt and type in the following address to navigate to the catroot folder.
C:/Windows/System32/catroot2
- Press “Ctrl” + “A” once inside the folder to select all items inside it and press “Shift” + “Delete” to remove them from your computer.
- After removing these, confirm any prompts that might spring up on your screen.
- After that, open the command prompt back up and execute the following command.
net start cryptsvc
- Try to update your computer and check to see if the issue still persists.


Method 8: Configuring Services to Start Automatically
Sometimes, your computer might be preventing certain services from starting and functioning in the background due to which the update might not be properly installed or configured to be applied on your computer. Therefore, in this step, we will be setting up some services to startup automatically. For that:
- Press “Windows’ + “R” to launch the Run prompt.
- Type in “cmd” and press “Ctrl” + “Shift” + “Enter” to provide admin permissions.

- Type in the following commands one by one in the command prompt and press “Enter” after each to execute them.
SC Config wuauserv start=auto SC Config bits start=auto SC Config cryptsvc start=auto SC Config trustedinstaller start=auto
- This way, we will have configured these services to startup and run automatically in the background.
- Check to see if the issue persists.

Method 9: Re-register Windows Update and BITS Files
It is possible that some windows update files and Bits files might not be properly registered on your computer. Therefore, in this step, we will be re-registering these files on the computer and then we will check to see if that fixes our issue. For that:
- Press “Windows’ + “R’ to open the Run prompt.
- Type in “cmd” and then press the “Ctrl” + “Shift” + “Enter” buttons to provide admin permissions.

Type in the following commands one by one and press “Enter” after each to register the components.regsvr32.exe atl.dll regsvr32.exe urlmon.dll regsvr32.exe mshtml.dll regsvr32.exe shdocvw.dll regsvr32.exe browseui.dll regsvr32.exe jscript.dll regsvr32.exe vbscript.dll regsvr32.exe scrrun.dll regsvr32.exe msxml.dll regsvr32.exe msxml3.dll regsvr32.exe msxml6.dll regsvr32.exe actxprxy.dll regsvr32.exe softpub.dll regsvr32.exe wintrust.dll regsvr32.exe dssenh.dll regsvr32.exe rsaenh.dll regsvr32.exe gpkcsp.dll regsvr32.exe sccbase.dll regsvr32.exe slbcsp.dll regsvr32.exe cryptdlg.dll regsvr32.exe oleaut32.dll regsvr32.exe ole32.dll regsvr32.exe shell32.dll regsvr32.exe initpki.dll regsvr32.exe wuapi.dll regsvr32.exe wuaueng.dll regsvr32.exe wuaueng1.dll regsvr32.exe wucltui.dll regsvr32.exe wups.dll regsvr32.exe wups2.dll regsvr32.exe wuweb.dll regsvr32.exe qmgr.dll regsvr32.exe qmgrprxy.dll regsvr32.exe wucltux.dll regsvr32.exe muweb.dll regsvr32.exe wuwebv.dll
- After executing the commands listed above, check to see if the issue still persists.

Note: After trying the following fixes, if the issue still persists, try to perform a clean boot and check if that fixes it. If it does, update in the clean boot and then get out of it after the update is completed. If that doesn’t work, try to go for a clean install of Windows.