Το σφάλμα " Μια εξαίρεση win32 που προέκυψε στο * application_name * " εμφανίζεται συνήθως όταν ο χρήστης προσπαθεί να ξεκινήσει μια εφαρμογή που δημιουργήθηκε στο Visual Studio. Οι περισσότερες περιπτώσεις παρουσίας αυτού του σφάλματος σχετίζονται με Uplay, Internet Explorer και πολλά παιχνίδια παλαιού τύπου που δημιουργήθηκαν αρχικά για παλαιότερες εκδόσεις των Windows.

Σημείωση : Δείτε πώς μπορείτε να διορθώσετε μια βιβλιοθήκη χρόνου εκτέλεσης που σχετίζεται με το Visual C ++.
Τι προκαλεί το σφάλμα "Εξαίρεση χωρίς χειρισμό στην εφαρμογή σας" στα Windows;
Υπάρχουν πολλές απλές αιτίες αυτού του προβλήματος και το πρόβλημα μπορεί να αντιμετωπιστεί αποτελεσματικά εάν είστε σε θέση να αναγνωρίσετε το σενάριό σας με βάση τον εντοπισμό της σωστής αιτίας. Δείτε την παρακάτω λίστα:
- Το antivirus σας μπορεί να είναι ο ένοχος - Ορισμένα εργαλεία προστασίας από ιούς, όπως το Panda Antivirus, είναι γνωστό ότι προκάλεσαν αυτό το ζήτημα, οπότε βεβαιωθείτε ότι τα αντικαταστήσατε.
- Ορισμένα προγράμματα ή κακόβουλα προγράμματα ενδέχεται να εκτελούνται - Εάν ένα εγκατεστημένο πρόγραμμα ή κακόβουλο λογισμικό εκτελείται στον υπολογιστή σας, ίσως θελήσετε να το απαλλαγείτε. Βεβαιωθείτε ότι ξεκινάτε σε καθαρή εκκίνηση για να δείτε αν αυτή είναι η σωστή αιτία.
- Η εγκατάσταση του Microsoft .NET Framework είναι κατεστραμμένη - Εάν τα βασικά της αρχεία είναι κατεστραμμένα, μπορείτε είτε να προσπαθήσετε να επιδιορθώσετε την εγκατάστασή της, να εγκαταστήσετε μια νεότερη έκδοση είτε να εκτελέσετε μια σάρωση SFC.
- Ο εντοπισμός σφαλμάτων σεναρίων ενεργοποιείται μέσω μητρώου - Όπως αποδεικνύεται, ένα συγκεκριμένο κλειδί μητρώου μπορεί να συμβάλει στην εμφάνιση αυτού του ζητήματος. Για να το φροντίσετε, θα πρέπει να απενεργοποιήσετε το Script Debugging Via Registry Keys.
- Παραβίαση πρόσβασης στο Msvcr92.dll - Η υπέρβαση του buffer προέλευσης ή ένα ακατάλληλο τελικό byte είναι επίσης πιθανές αιτίες αυτού του ζητήματος. Για την αντιμετώπισή τους, θα πρέπει να εγκαταστήσετε κάθε εκκρεμότητα ενημέρωσης των Windows.
- Διαγραφή του κλειδιού μητρώου εκκίνησης Ubisoft - Εάν δείτε αυτό το σφάλμα κατά την προσπάθεια εκκίνησης του Uplay.exe, αυτό οφείλεται σε σφάλμα με το Ubisoft Game Launcher. Αυτό το ζήτημα μπορεί επίσης να επιλυθεί μέσω μητρώου διαγράφοντας την τιμή που ανήκει σε αυτόν τον εκκινητή.
- Διαφθορά αρχείων συστήματος - Μια ασυνέπεια αρχείων συστήματος μπορεί επίσης να δημιουργήσει αυτό το ζήτημα. Η ελαφριά καταστροφή μπορεί να επιλυθεί με απλές σαρώσεις DISM και SFC. Σε πιο σοβαρές περιπτώσεις, μια καθαρή εγκατάσταση ή εγκατάσταση επισκευής θα σας βοηθήσει στην επίλυση του προβλήματος.
Λύση 1: Εγκαταστήστε κάθε εκκρεμή ενημέρωση των Windows
Μία από τις πιο συνηθισμένες αιτίες που θα καταλήξουν να προκαλούν το σφάλμα " Μια εξαίρεση win32 εξαιρέθηκε " είναι μια εφαρμογή που δημιουργήθηκε για την πλατφόρμα x64 χρησιμοποιώντας το MSVCR90.DLL που καταλήγει να καλεί τη συνάρτηση strncpy.
Σε αυτήν την περίπτωση, μια παραβίαση πρόσβασης που προκλήθηκε στο αρχείο Msvcr92.DLL πιθανότατα θα προκαλέσει την διακοπή της απόκρισης της εφαρμογής στη συνάρτηση strncpy. Η υπέρβαση του buffer προέλευσης ή το ακατάλληλο τελικό byte είναι οι πιο πιθανές αιτίες αυτού του ζητήματος.
Ευτυχώς, η Microsoft γνωρίζει ήδη αυτό το ζήτημα και έχει κυκλοφορήσει μια επείγουσα επιδιόρθωση για αυτό το ζήτημα που θα το επιλύσει αυτόματα. Για να το εκμεταλλευτείτε, το μόνο που χρειάζεται να κάνετε είναι να ενημερώσετε την έκδοση του λειτουργικού σας συστήματος στην πιο πρόσφατη διαθέσιμη έκδοση.
Σημείωση: Αυτή η επείγουσα επιδιόρθωση προωθήθηκε σε μια αναθεώρηση του Visual Studio 2008, την οποία τα Windows ενημερώνουν αυτόματα, οπότε τα παρακάτω βήματα είναι καθολικά και πρέπει να λειτουργούν ανεξάρτητα από την έκδοση του λειτουργικού σας συστήματος.
Ακολουθεί ένας γρήγορος οδηγός για την ενημέρωση της έκδοσης των Windows στην πιο πρόσφατη έκδοση, προκειμένου να εγκαταστήσετε την επείγουσα επιδιόρθωση για το Visual Studio 2008 και να επιλύσετε το ζήτημα:
- Πατήστε το πλήκτρο Windows + R για να ανοίξετε ένα παράθυρο διαλόγου Εκτέλεση . Στη συνέχεια, πληκτρολογήστε 'ms-settings: windowsupdate' και πατήστε Enter για να ανοίξετε την καρτέλα ενημέρωσης των Windows της εφαρμογής Ρυθμίσεις .
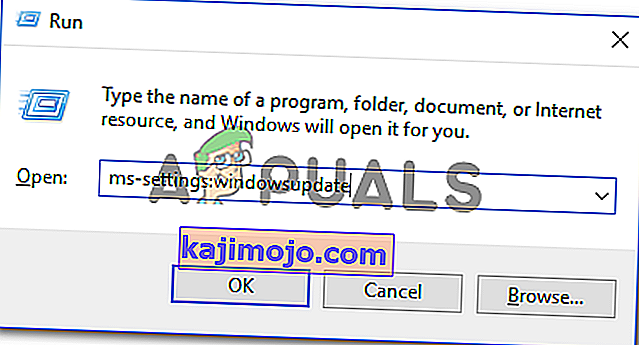
Σημείωση: Σε περίπτωση που αντιμετωπίσετε αυτό το ζήτημα στα Windows 7 ή Windows 8.1. χρησιμοποιήστε την εντολή «wuapp» .
- Αφού φτάσετε στην οθόνη του Windows Update, ξεκινήστε κάνοντας κλικ στο Έλεγχος για ενημερώσεις . Στη συνέχεια, ξεκινήστε να ακολουθείτε τις οδηγίες που εμφανίζονται στην οθόνη για να ολοκληρώσετε την εγκατάσταση κάθε ενημέρωσης των Windows που περιμένει να εγκατασταθεί.

Σημείωση: Λάβετε υπόψη ότι είναι σημαντικό να εγκαταστήσετε κάθε ενημέρωση και όχι μόνο τις κρίσιμες. Δεδομένου ότι η επείγουσα επιδιόρθωση περιλαμβάνεται σε μια αναθεώρηση του Visual Studio, ενδέχεται να βρείτε την εν λόγω ενημέρωση στην ενότητα Προαιρετικό, οπότε φροντίστε να εγκαταστήσετε όλες αυτές.
- Σε περίπτωση που σας ζητηθεί να κάνετε επανεκκίνηση προτού λάβετε την ευκαιρία να εγκαταστήσετε κάθε διαθέσιμη ενημέρωση, κάντε το. Αλλά φροντίστε να επιστρέψετε στην ίδια οθόνη αφού ολοκληρωθεί η επόμενη εκκίνηση για να ολοκληρώσετε την εγκατάσταση των υπόλοιπων ενημερώσεων.
- Μόλις εγκατασταθεί κάθε εκκρεμή ενημέρωση, επανεκκινήστε τον υπολογιστή σας για μια τελευταία φορά και, στη συνέχεια, επαναλάβετε την ενέργεια που προκαλούσε προηγουμένως το μήνυμα σφάλματος για να δείτε εάν το πρόβλημα επιλύθηκε.


Σε περίπτωση που εξακολουθείτε να αντιμετωπίζετε το σφάλμα " Προέκυψε εξαίρεση win32 εξαιρέθηκε ", μεταβείτε στην επόμενη μέθοδο παρακάτω.
Λύση 2: Αντικαταστήστε το Antivirus σας
Τα δωρεάν εργαλεία προστασίας από ιούς μπορεί να είναι αρκετά χρήσιμα και μπορούν να κάνουν τη δουλειά τους προστατεύοντας τον υπολογιστή σας, αλλά μερικές φορές απλά δεν ταιριάζουν καλά με άλλα πράγματα στον υπολογιστή σας. Εξετάστε το ενδεχόμενο αντικατάστασης του ιού σας εάν προκαλεί αυτό το πρόβλημα ενώ είναι ενεργοποιημένο!
- Κάντε κλικ στο μενού Έναρξη και ανοίξτε τον Πίνακα Ελέγχου αναζητώντας το. Εναλλακτικά, μπορείτε να κάνετε κλικ στο εικονίδιο με το γρανάζι για να ανοίξετε τις ρυθμίσεις εάν χρησιμοποιείτε Windows 10.
- Στον Πίνακα Ελέγχου, επιλέξτε Προβολή ως - Κατηγορία στην επάνω δεξιά γωνία και κάντε κλικ στο Κατάργηση εγκατάστασης προγράμματος στην ενότητα Προγράμματα.

- Εάν χρησιμοποιείτε την εφαρμογή Ρυθμίσεις, κάνοντας κλικ στο Εφαρμογές θα ανοίξει αμέσως μια λίστα με όλα τα εγκατεστημένα προγράμματα στον υπολογιστή σας.
- Εντοπίστε το εργαλείο προστασίας από ιούς στον Πίνακα Ελέγχου ή τις Ρυθμίσεις και κάντε κλικ στο Κατάργηση εγκατάστασης .
- Ο οδηγός απεγκατάστασης θα πρέπει να ανοίξει, οπότε ακολουθήστε τις οδηγίες για την κατάργησή του.

- Κάντε κλικ στο κουμπί Τέλος όταν το πρόγραμμα απεγκατάστασης ολοκληρώσει τη διαδικασία και επανεκκινήστε τον υπολογιστή σας για να δείτε εάν θα εξακολουθούν να εμφανίζονται σφάλματα. Βεβαιωθείτε ότι έχετε επιλέξει μια καλύτερη επιλογή προστασίας από ιούς .
Λύση 3: Διαγραφή της τιμής μητρώου εκκίνησης (εάν υπάρχει)
Εάν αντιμετωπίζετε το σφάλμα " Παρουσιάστηκε σφάλμα εξαίρεσης win32 " κατά την προσπάθεια εκκίνησης του Uplay.exe ή μιας διαφορετικής εφαρμογής που ανήκει στο Ubisoft, πιθανότατα οφείλεται σε σφάλμα με το Ubisoft Game Launcher.
Όπως αποδεικνύεται, αυτό φαίνεται να είναι ένα διαδεδομένο ζήτημα στα Windows 10, ειδικά μεταξύ των χρηστών που έχουν εγκαταστήσει ταυτόχρονα το Steam και το Uplay.
Several affected users that we’re struggling to resolve this issue have managed to get it fixed by using the Registry Editor to find the string registry value belonging to the launcher and deleting it. This supposedly eliminates the conflict, allowing both applications to function properly under the same machine.
Here’s a quick guide on deleting the Registry value associated with the Uplay launcher:
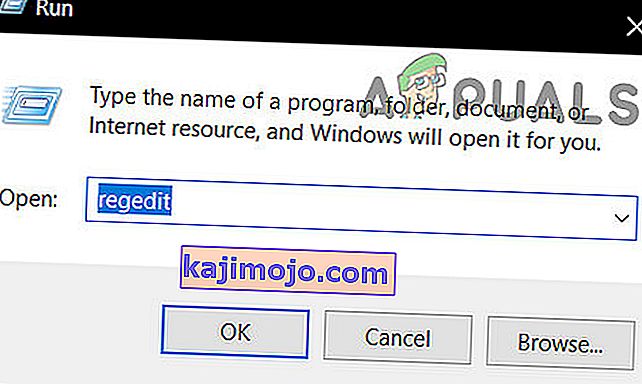
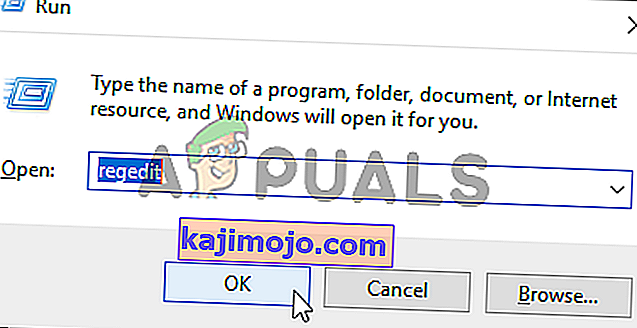
- Press Windows key + R to open up a Run dialog box. Inside the text box, type ‘regedit’ and press Enter to open up the Registry Editor. When you are prompted by the UAC (User Account Control) prompt, type Yes to grant administrative privileges.
- Once you’re inside the Registry Editor, use the left-hand side section of the window to navigate to the following location:
Computer\HKEY_LOCAL_MACHINE\SOFTWARE\WOW6432Node\Ubisoft
Note: You can either navigate there manually or you can paste the location directly into the navigation bar at the top and press Enter to get there instantly.
- After you manage to land in the correct location, move down to the right-hand section of the screen, right-click on Launcher and choose to Delete to get rid of it.

Note: In case you can delete the key, here’s how to take ownership of registry keys.
Note: After you delete it, the launcher will be forced to create a new Launcher string value with fresh data, which should resolve the issue.
- Once the key has been deleted, close Registry Editor and restart your computer.
- At the next computer startup, repeat the action that was previously causing the “An unhandled win32 exception occurred‘ error and see if the problem is resolved.


In case the same issue is persisting, move down to the next potential fix below.
Solution 4: Reset Internet Explorer (if applicable)
Another potential instance with the potential of creating this issue is a series of corrupted Internet Explorer (IE). If you’re encountering the “An unhandled win32 exception occurred in iexplore.exe’ error chances are it appears after a failing script.
To fix this issue, you should reset your Internet Explorer settings via the Internet Options menu. This operation was confirmed to be successful by a lot of users that were dealing with this error.
Here’s a quick guide on resetting Internet Explorer in order to resolve the “An unhandled win32 exception occurred‘ error:
- Ensure that Internet Explorer, Edge or any other associated instance is turned off and no background process is running.
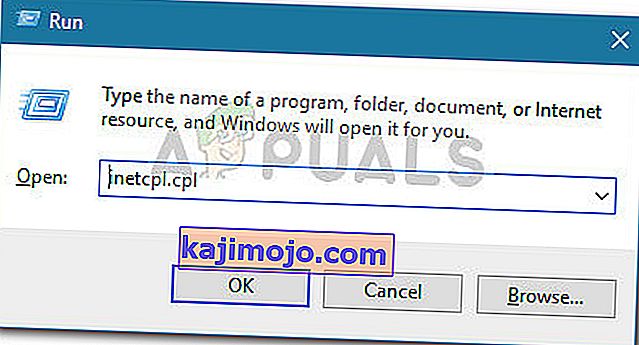
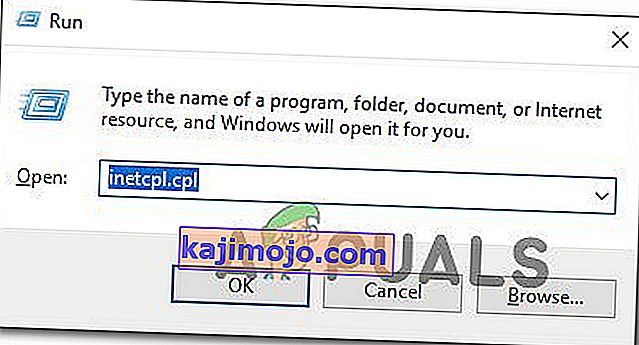
- Press Windows key + R to open up a Run dialog box. Inside the text box, type ‘inetcpl.cpl’ and press Enter to open up the Internet Options menu.
Note: If you are prompted by the UAC (User Account Control), click Yes to grant administrative privileges.
- After you manage to get inside the Internet Properties screen, select the Advanced tab from the horizontal menu at the top. Next, go to the Reset Internet Explorersettings and click on the Reset button.
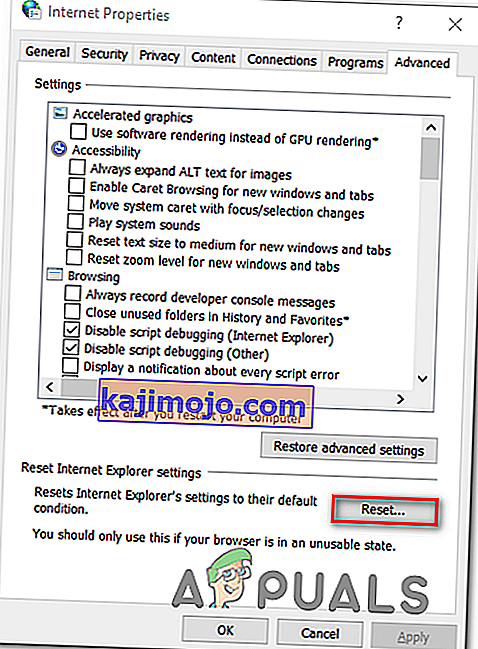
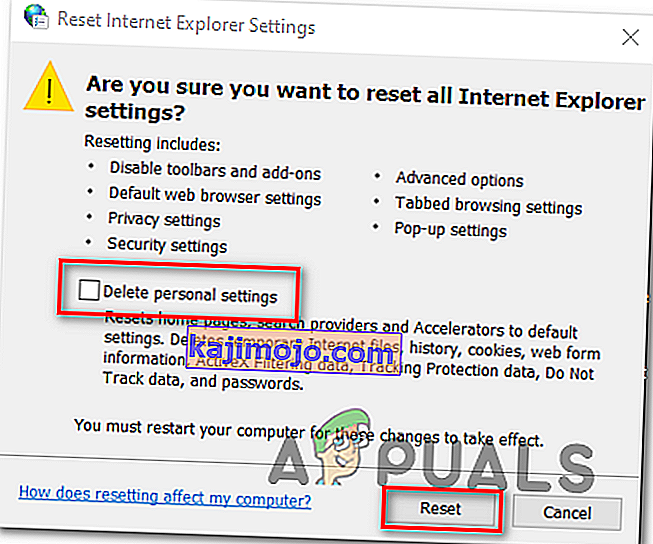
- Once you see the confirmation screen, ensure that the box associated with Delete personal settings is checked, then click on the Reset button.
- Wait until the operation is complete, then restart your machine and see if the issue is resolved at the next computer startup.


In case the same “An unhandled win32 exception occurred in iexplore.exe’ error is still occurring, move down to the next method below.
Solution 5: Disable Script Debugging and associated Registry Keys (if applicable)
If you’re encountering the issue with Internet Explorer on a machine that has VS installed on it, the issue can also occur due when Script Debugging is enabled and the registry entries end up containing corrupted data.
Several affected users that encountered this issue have confirmed that the issue was resolved after they accessed the Internet Options menu to disable Script Debugging and then deleted the associated keys using Registry Editor.
Here’s a quick guide on doing this in order to fix the “An unhandled win32 exception occurred in iexplorer.exe’ error:
- Press Windows key + R to open up a Run dialog box. Next, inside the text box, type ‘inetcpl.cpl’ and press Enter to open up the Internet Options menu. If you are prompted by the User Account Control (UAC), click Yes to grant administrative privileges.
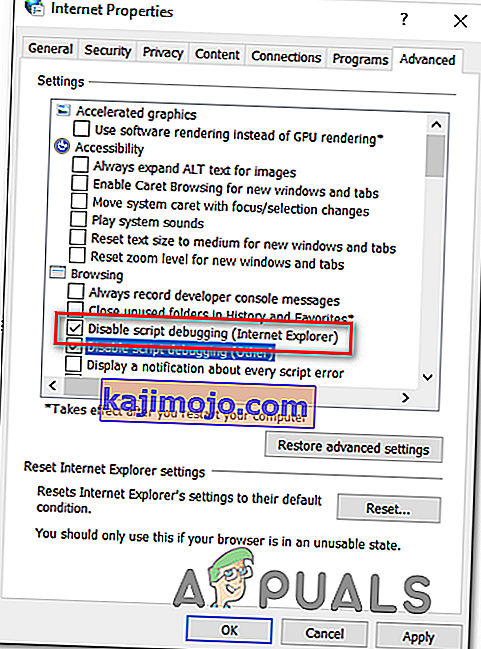
- Once you manage to find yourself inside the Internet Properties screen, use the menu at the top to select the Advanced tab.
- Inside the Internet Properties screen, scroll down through the Settings menu and check the box associated with Disable script debugging (Internet Explorer).
- Once the modification is enforced, hit Apply to save the changes, then close the Internet Properties window.
- Press Windows key + R once again to open up another dialog box. This time, type ‘regedit’ and press Enter to open up Registry Editor. You will need to grant admin access, so click Yes when prompted by the User Account Control window.
- Inside the Registry Editor, navigate to the following location using the left-hand menu:
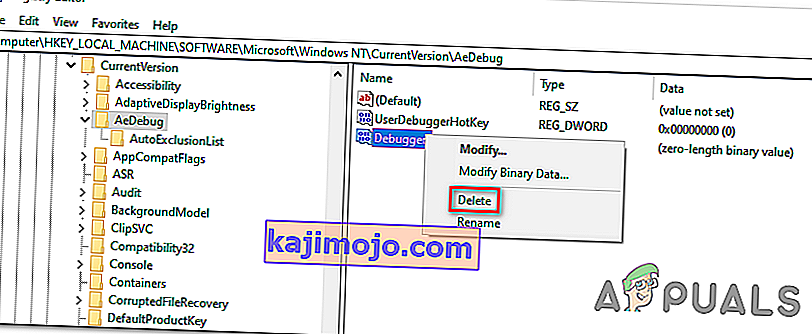
HKEY_LOCAL_MACHINE\SOFTWARE\Microsoft\Windows NT\CurrentVersion\AeDebug (32 - Bit Machine) HKEY_LOCAL_MACHINE\SOFTWARE\Wow6432Node\Microsoft\Windows NT\CurrentVersion\AeDebug (64 - Bit Machine)
Note: The location of the file we need to delete is different depending on the Windows version that you’re using. If you have a 32 – bit Windows version use the first location, else, use the second.
- Once you arrive to the correct location, move down to the right-section, right-click on Debugger and choose Delete from the context menu.
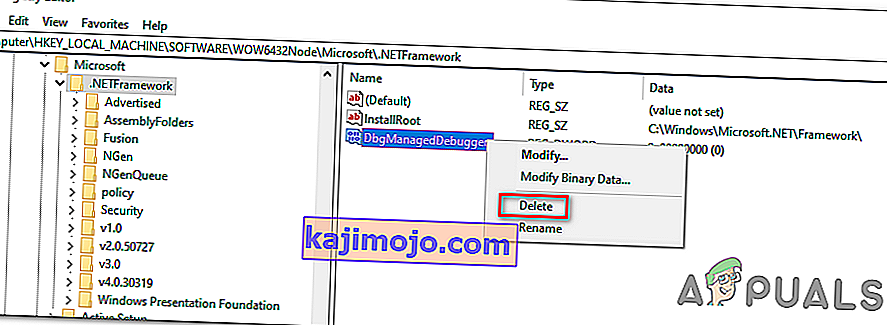
- Once this key is deleted, navigate to this second location:
HKEY_LOCAL_MACHINE\SOFTWARE\Microsoft\.NETFramework\ (32 - Bit Machine) HKEY_LOCAL_MACHINE\SOFTWARE\Wow6432Node\Microsoft\.NETFramework (64 - Bit Machine)
Note: Access the registry key associated with your Windows bit version that you’re using.
- When you arrive at the correct location, move over to the right-hand section and delete the DbgManagedDebugger value by right-clicking on it and choosing Delete from the context menu.
- After you manage to delete the value, close the Registry Editor and restart your computer.
- Once the next startup is complete, see if the same issue is still occurring.


In case the “An unhandled win32 exception occurred’ error is still occurring, move down to the next method below.
Solution 6: Install the Latest Version of NET Framework and Repair it
Having NET Framework installed on your computer is vital and plenty of modern games and programs depend on you having it installed. Before repairing it, follow the steps below in order to install the latest version on your computer.
Navigate to this link and click the red download button in order to download the latest version of the Microsoft .NET Framework. After the download has finished, locate the file you downloaded and run it. Note that you will need to have constant access to the Internet. Follow the instructions on-screen to proceed with the installation.
- After installing the latest version, it’s time to check its integrity. On your keyboard, use the Windows Key + R key combination to open the Run dialog box.
- Type in control.exe and click OK in order to open it.

- Click the Uninstall a Program option and click Turn Windows features on or off. Make sure you locate the .NET Framework 4.x.x entry and make sure it’s enabled. ‘x.x’ marks the latest version available for your operating system.
- If the checkbox next to .NET Framework 4.x.x is not enabled, enable it by clicking the box. Click OK to close the Windows Feature window and reboot the computer.

- If .Net Framework 4.x.x is already enabled, you can repair .Net Framework by clearing the box and rebooting the computer. After the computer has restarted, re-enable .Net Framework and restart the computer again.
Solution 7: Perform a Clean Boot
There are various other programs and services which can affect the proper functionality of the Microsoft .NET Framework suite. In most cases, the cause is the antivirus you have installed and you can try disabling it to see if the error persists. However, to make sure nothing can interfere with the installation, we recommend you perform a clean boot which will disable all non-Microsoft programs and services from starting up. This way, you can easily deduct just which program causes this error to happen!
- Use the Windows + R key combination on your keyboard. In the Run dialog box type MSCONFIG and click OK.
- Click on the Boot tab and uncheck the Safe Boot option (if checked).

- Under the General tab in the same window, click to select the Selective startup option, and then click to clear the Load startup items check box to make sure it’s not checked.
- Under the Services tab, click to select the Hide all Microsoft services check box, and then click Disable all.

- On the Startup tab, click Open Task Manager. In the Task Manager window under the Startup tab, right click on each startup item which is enabled and select Disable.

- After this, you will need to perform some of the most boring processes and that is enabling the Startup items one by one and restarting your computer. After that, you need to check whether the problem appears again. You will need to repeat the same process even for the Services which you have disabled in Step 4.
- Once you locate the problematic startup item or service, you can undertake action in order to solve the problem. If it is a program, you can reinstall it or repair If it is a service, you can disable it, etc.
Solution 8: Use SFC to Scan for Memory Leaks
It has been reported that the Microsoft .NET Framework corruption is related to faulty system files. These problems are rooted deep inside the system files and the only way to try to resolve them is by running the System File Checker (SFC). It will scan your system files for errors and possible repair or replace them. Follow the steps below in order to do so!
- Search for “Command Prompt” by typing it either right in the Start menu or by pressing the search button right next to it. Right-click the first entry which will pop up as a search result and select the “Run as administrator” context menu entry.
- Additionally, you can also use the Windows Logo Key + R key combination in order to bring up the Run dialog box. Type in “cmd” in the dialog box which appears and use the Ctrl + Shift + Enter key combination for admin Command Prompt.

- Type in the following commands in the window and make sure you press Enter after typing each one. Wait for the “Operation completed successfully” message or something similar to know that the method worked.
sfc /scannow
- Try to restart your computer and check to see if the Unhandled Exception has Occurred in your Application error continues to appear on your computer.
Solution 9: Performing a Clean Install
If none of the methods presented below have managed to help you in resolving the issue, it’s very likely that you’re dealing with some kind of Windows inconsistency that cannot be resolved conventionally.
If this scenario is applicable, you should be able to fix the issue by resetting every component associated with your Windows installation. If you want to go this route, you have two ways forward. It all boils down to the procedure that you want to follow:
- Repair install (in-place repair) – This procedure is the best approach when you need to refresh every OS component, but some users might end up considering it a little too tedious for their taste. Keep in mind that you will need a compatible installation media in order to enforce this fix, but the major advantage is that all your personal data (including games, applications and personal media) will be preserved even if you don’t back up your computer.
- Clean install – If you’re looking for the simplest solution, this is the way to go. You will not need an installation media to enforce it (it’s all done through the Windows GUI). But unless you back up your data in advance, be prepared for total data loss.