Το σφάλμα 0xc000000e κατά την προσπάθεια εκκίνησης των παραθύρων σημαίνει ότι αντιμετωπίζετε κατεστραμμένα δεδομένα διαμόρφωσης εκκίνησης. Το Boot Configuration Data είναι ένα παγκόσμιο κατάστημα για όλες τις επιλογές και ρυθμίσεις που σχετίζονται με την εκκίνηση σε νεότερους υπολογιστές με Windows.
Θα λάβετε αυτό το σφάλμα κατά την προσπάθεια εκκίνησης της συσκευής σας και θα εμφανιστεί μια μαύρη οθόνη που θα σας δώσει οδηγίες σχετικά με τον τρόπο επισκευής του υπολογιστή σας χρησιμοποιώντας έναν δίσκο εγκατάστασης ή μια μονάδα ανάκτησης. Δυστυχώς, η κατοχή αυτής της μονάδας ανάκτησης είναι ο μόνος τρόπος για να λύσετε αυτό το ζήτημα, οπότε θα πρέπει να έχετε ένα χέρι πριν ξεκινήσετε. Εάν δεν το έχετε, είναι αρκετά εύκολο να δημιουργήσετε ένα χρησιμοποιώντας το εργαλείο Rufus ή Windows Media Creation από οποιονδήποτε άλλο υπολογιστή ή φορητό υπολογιστή.

Θα χρειαστεί επίσης να κάνετε εκκίνηση στο BIOS για να αλλάξετε τη σειρά εκκίνησης και να κάνετε την εκκίνηση του υπολογιστή σας από τη μονάδα ανάκτησης αντί του σκληρού δίσκου. Για να το κάνετε αυτό, ακολουθήστε τα παρακάτω βήματα:
- Εισαγάγετε τις ρυθμίσεις BIOS ή UEFI πατώντας το καθορισμένο πλήκτρο του κατασκευαστή της μητρικής πλακέτας σας πριν από την εκκίνηση των Windows. Αυτό το κλειδί είναι συνήθως Esc, Delete, F2, F8, F10, F12 ή Backspace, ανάλογα με τον κατασκευαστή. Μπορείτε να κάνετε μια διαδικτυακή αναζήτηση σχετικά με τον τρόπο εισαγωγής του BIOS, ακολουθούμενο από το μοντέλο του υπολογιστή σας.
- Μόλις εισέλθετε, μεταβείτε στην εκκίνηση Χρησιμοποιήστε τις οδηγίες που βρίσκονται στο BIOS για να αλλάξετε τη σειρά εκκίνησης και ορίστε είτε το CD-ROM είτε τη θύρα USB ως την πρώτη συσκευή, ανάλογα με το αν η μονάδα ανάκτησης είναι CD ή μονάδα flash .
- Αποθηκεύστε τις ρυθμίσεις σας και βγείτε.

Μέθοδος 1: Αναδημιουργία των δεδομένων διαμόρφωσης εκκίνησης
Για να το κάνετε αυτό, θα πρέπει να εκκινήσετε τον υπολογιστή σας από τη μονάδα ανάκτησης. Εάν έχετε ρυθμίσει το BIOS με τα παραπάνω βήματα, μπορείτε να το κάνετε πατώντας οποιοδήποτε πλήκτρο μόλις εμφανιστεί το μήνυμα στην οθόνη σας. Μόλις γίνει εκκίνηση του υπολογιστή από τη μονάδα ανάκτησης, ακολουθήστε τα παρακάτω βήματα για να δημιουργήσετε ξανά το BCD:
- Στο παράθυρο διαλόγου Ρύθμιση των Windows , ορίστε τα πάντα στις κατάλληλες τιμές, επιλέξτε τη γλώσσα σας και κάντε κλικ στο
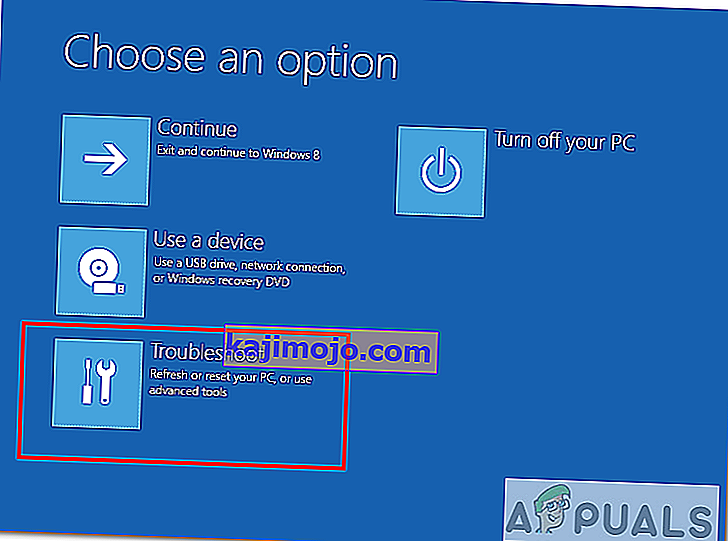
- Στην κάτω αριστερή γωνία, κάντε κλικ στο Επισκευή του υπολογιστή σας και επιλέξτε Αντιμετώπιση προβλημάτων από την οθόνη Επιλογή επιλογής.
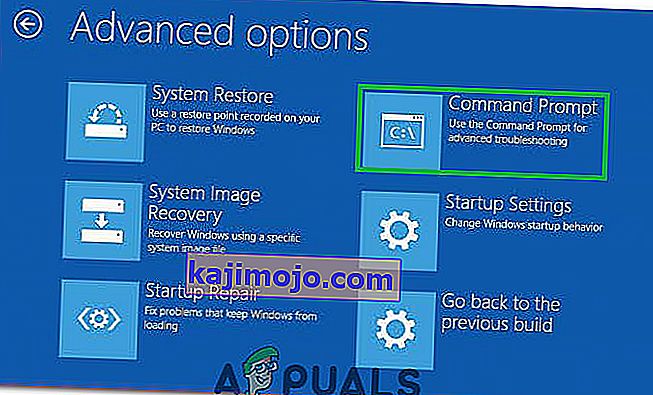
- Στην οθόνη Αντιμετώπιση προβλημάτων , κάντε κλικ στην επιλογή Επιλογές για προχωρημένους και κάντε κλικ στη γραμμή εντολών.
- Όταν ανοίξει η γραμμή εντολών, πληκτρολογήστε τις ακόλουθες εντολές, πατώντας Enter στο πληκτρολόγιό σας μετά από καθεμία από αυτές:
bootrec / scanos bootrec / fixmbr bootrec / fixboot bootrec / rebuildbcd
- Επανεκκινήστε τον υπολογιστή σας και θα πρέπει να εκκινήσει μια χαρά, χωρίς να αντιμετωπίσετε ξανά το πρόβλημα.

Μέθοδος 2: Επιδιορθώστε το λειτουργικό σας σύστημα με τη μονάδα ανάκτησης
Αυτή η μέθοδος θα επιδιορθώσει επίσης το λειτουργικό σας σύστημα με τη γραμμή εντολών της μονάδας ανάκτησης και θα πρέπει να μπορείτε να κάνετε εκκίνηση στα Windows χωρίς να αντιμετωπίσετε ξανά το πρόβλημα. Εκκινήστε από τη μονάδα ανάκτησης και ακολουθήστε τις παρακάτω οδηγίες.
- Χρησιμοποιήστε τα βήματα 1 έως 3 από την προηγούμενη μέθοδο για να μεταβείτε στη γραμμή εντολών της μονάδας ανάκτησης.
- Μόλις μπείτε στη γραμμή εντολών, πληκτρολογήστε τις παρακάτω εντολές, ακολουθούμενο από ένα Enter στο πληκτρολόγιό σας για να τις εκτελέσετε. Το βοηθητικό πρόγραμμα StartRep.exe διορθώνει τις τιμές περιβάλλοντος εκκίνησης και πρέπει να διορθώσει το σφάλμα BCD. Λάβετε υπόψη ότι ίσως χρειαστεί να επαναλάβετε αυτό το βήμα πολλές φορές σε περίπτωση αποτυχίας.
cd x: \ source \ recovery StartRep.exe
- Εάν το προηγούμενο βήμα επιδιόρθωσης των Windows δεν βοήθησε, πληκτρολογήστε bcdedit στη γραμμή εντολών, για να δείτε τις τιμές για τη Διαχείριση εκκίνησης των Windows.
- Σημειώστε τις τιμές για τη συσκευή . Εάν είναι άγνωστες , πληκτρολογήστε τις ακόλουθες εντολές, ακολουθούμενες από το Enter για να τις εκτελέσετε. Σημειώστε ότι πρέπει να αντικαταστήσετε το C: με το διαμέρισμα όπου είναι εγκατεστημένο το λειτουργικό σας σύστημα, εάν είναι απαραίτητο.
bcdedit / set {DEFAULT.EN_US} διαμέρισμα συσκευής = c: bcdedit / set {DEFAULT.EN_US} osdevice partition = c: bcdedit / set {BOOTMGR.EN_US} διαμέρισμα συσκευής = c:- Όταν ολοκληρωθεί η γραμμή εντολών, κλείστε την, αφαιρέστε τη μονάδα ανάκτησης και επανεκκινήστε το σύστημά σας. Δεν πρέπει να έχει προβλήματα εκκίνησης τώρα.
Το μόνο μειονέκτημα σε αυτές τις λύσεις είναι ότι απαιτούν μια ανάκαμψη, υπομονή και ισχυρά νεύρα. Ωστόσο, εάν τα ακολουθήσετε όπως περιγράφεται, θα πρέπει να διορθώσετε το σφάλμα που λάβατε και να συνεχίσετε να χρησιμοποιείτε τη συσκευή σας όπως πριν.
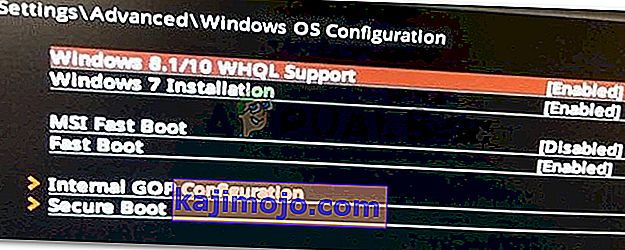
Μέθοδος 3: Ενεργοποιήστε την υποστήριξη WHQL των Windows 10 στο BIOS
Η ρύθμιση υποστήριξης WHQL των Windows 10 υπάρχει σε ορισμένους OEM. Έχει δύο βασικές λειτουργίες: ελέγχους για υπογεγραμμένα προγράμματα οδήγησης κατά τη διαδικασία εκκίνησης και σας επιτρέπει να ενεργοποιήσετε την υποστήριξη UEFI. Εάν χρησιμοποιείτε Windows 10, πρέπει να τα ενεργοποιήσετε και στη συνέχεια ο υπολογιστής σας μπορεί να εκκινήσει κανονικά. Ωστόσο, εάν δεν έχει επιλεγεί, ο υπολογιστής σας ενδέχεται να εκκινήσει σε σφάλμα 0xc000000e. Έτσι, μπορείτε να αποκτήσετε πρόσβαση στο BIOS για να δείτε εάν είναι ενεργοποιημένη η ρύθμιση υποστήριξης των Windows 10 WHQL. Εάν όχι, ενεργοποιήστε το για να δοκιμάσετε.
Θα πρέπει να σημειώσετε ότι η ρύθμιση Υποστήριξης WHQL των Windows 10 δεν υποστηρίζεται σε όλους τους υπολογιστές. Εάν ο υπολογιστής σας δεν τον διαθέτει, μπορείτε να ελέγξετε αν η υποστήριξη UEFI είναι ενεργοποιημένη στον υπολογιστή σας. Εάν όχι, μπορείτε να το ενεργοποιήσετε για να δείτε εάν εξαφανίζεται ο κωδικός σφάλματος 0xc000000e. Για να το ενεργοποιήσετε:
- Απενεργοποιήστε εντελώς τον υπολογιστή σας και αφήστε τον να καθίσει για τουλάχιστον μερικά λεπτά.
- Αφού βεβαιωθείτε ότι έχει παρέλθει επαρκής χρόνος, ξεκινήστε τη δημιουργία αντιγράφων ασφαλείας του υπολογιστή και θα πρέπει να παρατηρήσετε την επιλογή " Πατήστε αυτό το κουμπί για εκκίνηση στη λειτουργία Bios ".
- Πατήστε το κουμπί για εκκίνηση στη λειτουργία Bios.
- Μετά την επιτυχή εκκίνηση εντός της λειτουργίας Bios, ελέγξτε για να δείτε εάν υπάρχει ρύθμιση Windows WHQL στο Bios.
- Εάν υπάρχει, πατήστε "Enter" για να το επιλέξετε μετά την επισήμανση χρησιμοποιώντας τα πλήκτρα βέλους και επιλέξτε "Ενεργοποιημένο" για να το ενεργοποιήσετε στον υπολογιστή σας.
- Ελέγξτε αν αυτό επιλύει το πρόβλημα.

Εάν το σφάλμα εκκίνησης των Windows 10 0xc000000e εξακολουθεί να εμφανίζεται μετά την ενεργοποίηση της ρύθμισης υποστήριξης WHQL των Windows 10 ή της υποστήριξης UEFI, ίσως χρειαστεί να επαναφέρετε τη διαμόρφωση BIOS / UEFI στον υπολογιστή σας.
Μέθοδος 4: Αναδημιουργία BCD μέσω Easy Recovery Essentials
Το Easy Recovery Essentials είναι μια δυνατότητα αυτόματης επιδιόρθωσης συστήματος με ένα κλικ που ενσωματώνει πλήρη επισκευή και ανακατασκευή του BCD για την επίλυση του σφάλματος "0xc000000e", ακόμη και σε περιπτώσεις όπου τα Windows δεν θα εκκινήσουν ως αποτέλεσμα του σφάλματος.
Το αυτοματοποιημένο στοιχείο επισκευής εκκίνησης του EasyRE θα αντιμετωπίσει όλα τα ζητήματα που σχετίζονται με το BCD, τη διόρθωση του BCD ή την αναδημιουργία του από το μηδέν χρησιμοποιώντας τη σωστή κωδικοποίηση και διαδρομή για το διαμέρισμα που αρνείται να φορτώσει σωστά. Θα επισημάνει επίσης το δίσκο ως online για να διασφαλίσει ότι λειτουργεί σωστά.
Τα Easy Recovery Essentials είναι εγγυημένα ότι θα διορθώσουν αυτόματα το σφάλμα "0xc000000e" χρησιμοποιώντας την ενσωματωμένη αυτόματη επιλογή επισκευής. Το EasyRE είναι προς το παρόν διαθέσιμο για Windows XP, Vista, 7, 8, 10 και μπορεί να ληφθεί και να δημιουργηθεί σε οποιονδήποτε υπολογιστή.
- Αποκτήστε έναν άλλο υπολογιστή που θα μπορούσατε να χρησιμοποιήσετε για να δημιουργήσετε ένα USB από το οποίο θα χρησιμοποιούσαμε για την εκκίνηση του υπολογιστή.
- Κατεβάστε τα βασικά στοιχεία Easy Recovery από εδώ.

- Κάψτε την εικόνα.
- Εκκινήστε τον υπολογιστή σας από το Easy Recovery Essentials CD ή USB που δημιουργήσατε.
- Once EasyRE is running, choose the “Automated Repair” option and click Continue.
- After EasyRE scans your computer’s drives, identify and select the drive letter for your Windows installation from the list, and then click on the Automated Repair Option to begin.
- Easy Recovery Essentials will start analyzing the selected drive for problems. EasyRE will test for and attempt to automatically correct errors with the disk, partition, bootsector, filesystem, bootloader, and registry. No intervention is required, as EasyRE’s repair is fully automated.
- Once the process is complete, EasyRE will report its findings. Click on the Restart button to reboot your PC and test the changes.

Method 5: Reset BIOS/UEFI Configuration
Some users said that their error 0xc000000e issue is solved by resetting the BIOS/UEFI configuration. So, you can consider trying this method to see whether this issue can be solved.
Step 1. Open BIOS Menu
To reset BIOS to default settings, you need to access the BIOS menu and find the Default Settings option first.
Windows 10 users can access advanced startup options Windows 10 and get into the BIOS menu. You can click Start -> Power, press and hold the Shift key, and click Restart button to reboot Windows into Windows Recovery Environment. Then click Troubleshoot -> Advanced Options -> UEFI Firmware Settings, and click Restart to enter into the BIOS settings screen.
Alternatively, you can also restart your computer normally and press the required key in the startup screen to boot into the BIOS settings window. The hotkey is varied from different computer manufacturers, and it could be F12, Del, Esc, F8, F2, etc.
Step 2. Find the Setup Defaults Option
The name and location of the “Setup Defaults” option may be different from various computers. It generally calls like: Load Default, Load Setup Defaults, Load Default Settings, Load BIOS Defaults, Load Optimal Defaults, etc.
Use the arrow keys on the computer keyboard to find the BIOS setup default option in the BIOS settings screen. You may find it in one of the BIOS tabs.
Step 3. Reset BIOS
After you find the Load Setup Defaults option, you can select it and press the Enter button to start resetting the BIOS to factory default settings in Windows 10.
At last, you can press F10 to save and exit BIOS. Your computer will automatically reboot. If you need to change BIOS settings again in the future, you can follow the same instructions to access BIOS again to change it.
Method 6: Mark Boot Disk As Online
It is possible in some cases, that the disk that you have connected to the computer or the USB that you are trying to boot from has been marked as offline by the computer. Some computers tend to prevent extra applications, hardware, and other things from being able to run as soon as the computer starts because it allows for more convenient and fast startup experience. Therefore, in this step, we will be marking the Disk as online.
You still need to use a bootable USB medium to do this job. We will show you a step-by-step guide here:
- After booting your computer from the bootable USB drive, you need to go to Next > Repair your computer. Then, you will enter WinRE.
- Go to Troubleshoot > Advanced options > Command Prompt.
- Make sure to properly enter your login credentials if you are asked by the computer.
- Type in the following command inside the command prompt to successfully launch the disk part utility on your computer.
diskpart
- Type in either one of the following commands in the next window to list the currently connected disk drives to your computer.
List Disk List Volume
- Once the disks have been listed, you need to identify the disk that contains the Windows operating system and the one that you want to mark as active.
- After identifying it, select the disk using the following command and replacing the alphabet with the driver letter of that disk.
select disk A Select Volume A (Replace A with the Drive Letter)
- After you have successfully selected the disk, you must mark the disk as online in order to initiate the recognization process of the disk at startup. Use the following commands to do that.
Online Disk Online Volume
- Type in the following command to successfully get out of the command prompt and restart your computer after that.
Exit
- Check to see if marking the Disk as online has fixed your issue.

Method 7: Check your data cables, BIOS and drivers
Unplug all HDD data cables, and then plug them again. Revert to the previous drivers and BIOS settings if they were changed, or use “Restore factory settings” option in the BIOS. Make sure to write down all current BIOS settings that were previously selected, just in case it is required to switch back. If the error is caused by a change of the SATA disk controller’s mode in the BIOS or firmware, the fix can be as simple as entering the BIOS and toggling the SATA controller’s “mode” setting. The exact instructions differ from one manufacturer to the other, but the options will resemble what is shown in the screenshots below.
To check the boot order, follow these steps:
- Restart the computer
- Press the necessary key to open the BIOS menu. This key depends on the computer manufacturer and computer model. This is usually listed on the first screen that appears on the monitor. It can be any of the following: Esc, Del, F2, F8, F10 or F12.
- If the screen shows multiple keys, find the key to open “BIOS”, “setup” or “BIOS menu”
- Attempt to toggle between all three (or more) modes until a combination that results in Windows booting successfully once more is found.
Method 8: Boot Windows In Safe Mode
If above solutions didn’t fix the problem, then Start Windows into safe mode. This will start your PC with minimum system requirements, will not load startup programs, add-ons etc. And allow performing troubleshooting steps to fix Boot Error 0xc000000e:
Before you enter the safe mode, you need to enter the Windows Recovery Environment (winRE). To do this, you will repeatedly turn your device OFF, then ON:
- Hold down the power button for 10 seconds to turn off your device.
- Press the power button again to turn on your device.
- On the first sign that Windows has started (for example, some devices show the manufacturer’s logo when restarting) hold down the power button for 10 seconds to turn off your device.
- Press the power button again to turn on your device.
- When Windows restarts, hold down the power button for 10 seconds to turn off your device.
- Press the power button again to turn on your device.
- Allow your device to fully restart and you should boot into the Windows Recovery Environment.
Now that you are in the Windows Recovery Environment, you will follow these steps to take you to safe mode:
- On the Choose an option, screen, select “Troubleshoot” and then “Advanced options.”

- Now click on “Startup Settings” and click on “Restart.”
- After your device restarts, you’ll see a list of options. Select option “4” from the list or press “F4” to enter Safe Mode.

Note: If you need to exit safe mode, simply restart your device, or:
- Press the “Windows logo key + R.”
- Type “msconfig” in the Run box and then select “OK”.

- Select the Boot tab and under Boot options, clear the Safe boot checkbox.

Method 9: Check your disk with CHKDSK utility
If the hard drive has its file integrity compromised, it is possible to use built-in Windows CHKDSK utility to scan the disk and fix the file system errors.
- Connect a USB drive that has been made bootable or insert the Windows Installation Disk on your computer.
- After connecting one of these, boot from that connected device.
- After booting your computer from the device, click on “Next” and then on the “Repair your Computer” option.
- On the next window, click on “Troubleshoot” and then on the “Advanced” Option.

- On the next screen, make sure to select the “CommandPrompt” option to successfully launch into the command prompt.
- Provide the login credentials of your account in order to boot inside the cmd.
- Inside the command prompt, type in the following command to successfully run the check disk utility on your computer.
chkdsk C: /f (Make sure to replace the "C" with the Drive letter of your partition).
- Confirm any on-screen prompts and wait for the scan to be fully completed.
- Check to see if the issue is fixed by performing this step.
Method 10: Disable fast startup Feature
If your computer has been set up to use the Fast Startup feature, you might be getting this error message on your screen because of doing so. The Fast Startup feature is known to malfunction with some operating systems and hardware combinations.
Basically, when enabled, the feature automatically sends some launch configurations to be stored in your RAM to allow for a faster startup as indicated by its name but this configuration data can sometimes be corrupted which can lead to this error on your computer. Therefore, in this step, we will be disabling it completely. For that:
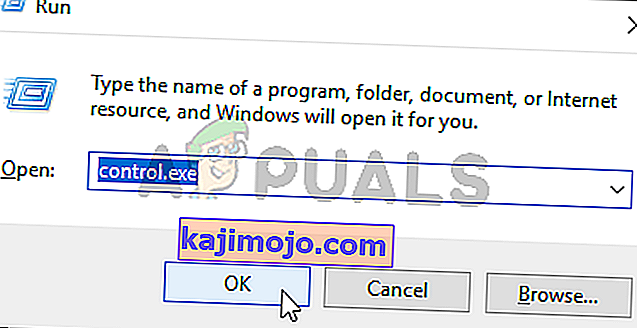
- Press “Windows” + “R” to open the Run prompt.
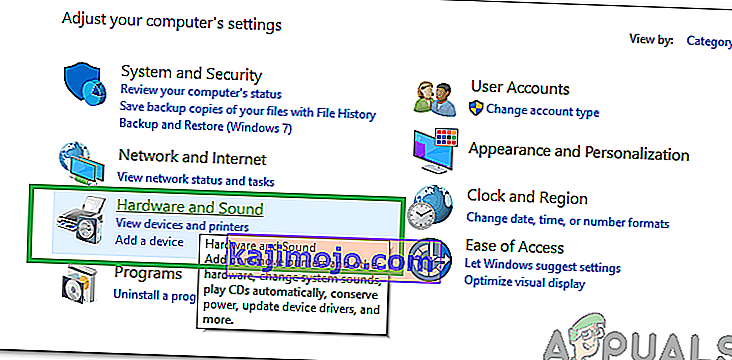
- Type in “Control Panel” and press “enter” to launch the classical Control Panel interface.
- Inside the control panel, click on the “Hardware and Sound” option and then select the “Power Options” button.
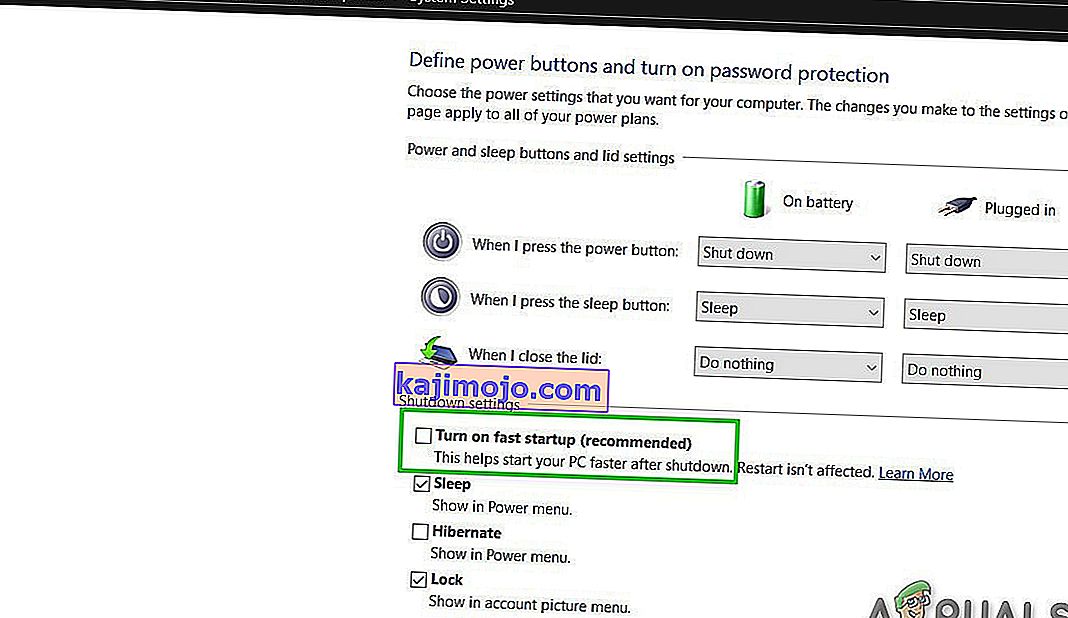
- Inside the power options, click on the “Choose what the power button does” from the left side.
- Click on the “Change Settings” option if the fast startup option is greyed out.
- Make sure to uncheck the “Turn on Fast Startup” option and save your changes.
- Closeout of the window and terminate any unnecessary applications.
- Click on the “Start Menu”, click on the “Power Options” and select “Shutdown” from the list.
- This option should completely power down your computer and after performing a complete shutdown, wait for some minutes before turning your computer back on.
- After the computer turns back on, check to see if the error message is fixed.
Note: This solution can only be applied if you are able to sometimes boot up your computer normally and are only encountering this error momentarily.


Method 11: Repair Corrupted System Files
It also possible in some situations that certain system files might have been corrupted due to a storage failure or due to some other reason. Therefore, in this step, we will be performing a complete repair of the corrupted system files and then we will check to see if doing so fixes this issue. For that:
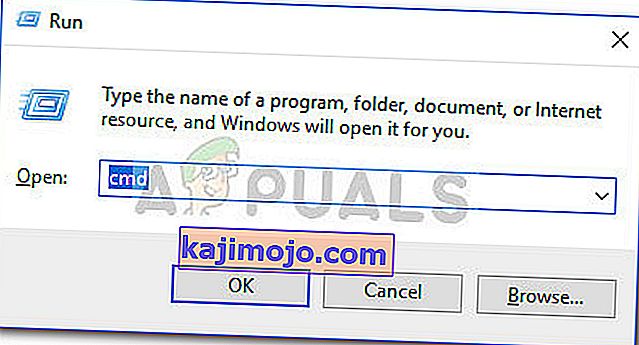
- Press “Windows” + “R” to open the Run prompt.
- Type in “cmd” and then press “Shift” + “Ctrl” + “Enter” to launch the command prompt with admin privileges.
- Type in the following commands one by one and press “Enter” after each to successfully run an SFC scan and a DISM Scan on your computer.
DISM /Online /Cleanup-Image /RestoreHealth sfc /scannow
- Restart your computer completely once these scans are completed.
- Check to see if by performing these scans, you were able to fix this issue on your computer.

Method 12: Run Windows Startup Repair
Startup Repair is capable of diagnosing and fixing the found issues. For example, it can automatically scan system files, registry settings, configuration settings, etc. and try to fix the problem on its own. Startup Repair is especially useful when your computer is unbootable. Since your computer fails to boot, Windows can boot into WinRE automatically. While, if it doesn’t appear, you can interrupt the boot process three times in a row, and then the WinRE screen appears. Alternatively, if you have a bootable USB medium, you can also set your computer to boot from it and go to Repair your computer to enter WinRE.
After you have successfully booted into the Windows Recovery Environment, click on the “Troubleshoot” option, and from there, select the “Advanced Options” screen. Inside the advanced options, select the “StartupRepair” button to successfully initiate the Startup Repairing process. Windows will begin to diagnose your computer automatically. When the process ends, your computer will restart automatically. You can wait to see whether it can boot successfully.

Λύση: Βεβαιωθείτε ότι δεν έχουν συνδεθεί πρόσθετες συσκευές πριν μεταβείτε στη γραμμή εντολών ή στο Startup Repair, είναι καλύτερο να δοκιμάσετε άλλη επανεκκίνηση με τον μικρότερο αριθμό συσκευών και εξωτερικών δίσκων συνδεδεμένων στον υπολογιστή. Αυτό θα διασφαλίσει ότι τίποτα που προστέθηκε πρόσφατα στον υπολογιστή δεν προκαλεί αυτό το ζήτημα. Θα ήταν καλύτερο να αποσυνδέσετε τυχόν πρόσφατες μονάδες USB, CD, DVD κ.λπ. Αυτό περιλαμβάνει επίσης μια συσκευή ανάγνωσης καρτών μνήμης. Βεβαιωθείτε ότι έχουν αποσυνδεθεί όλες οι εξωτερικές μονάδες δίσκου και τα κλειδιά USB ή οι μονάδες άλματος USB και, στη συνέχεια, δοκιμάστε ξανά.